 |
| you are here > Class Notes - Chapter 1 - Lesson 1-5 | |||||||||||||||||||||||||||||||||||
|
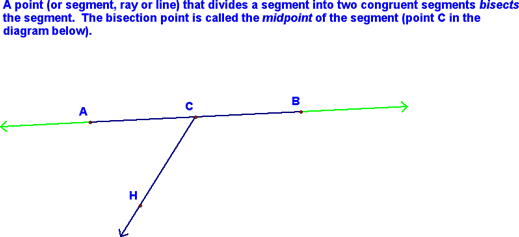
Division of Segments and Angles - Lesson 1-5 Today, we began started by defining a bisector and a midpoint.
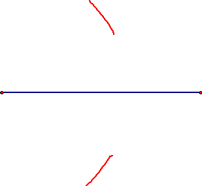
We then got out our compasses and learned how to create a perpendicular bisector of a given segment. To start, we need a segment (which you can draw using your straight edge). Then, we center our compass at one endpoint of the segment, make the radius of the compass be more than 1/2 the length of the segment (you can estimate it), and make an arc above and below the segment (see the red arcs below):
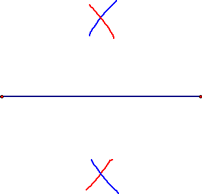
Now, with the same radius, draw similar arcs from the other endpoint:
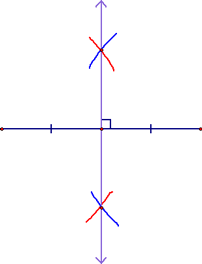
You're almost there...just place your straight edge on the x's (X marks the spot!) and draw in the perpendicular bisector. Mark it correctly and you've done your first construction (you did it all without a protractor or a ruler!).
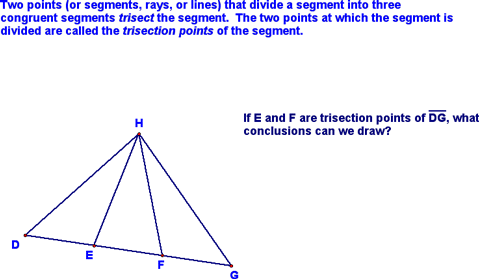
We then defined segment trisectors and trisection points.
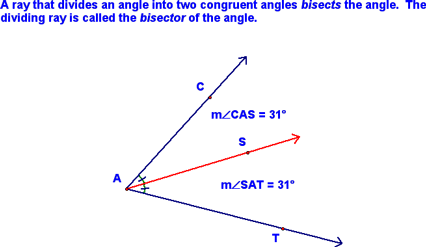
There is a construction for segment trisectors (in fact, there are any number of them), but we won't cover that...if you're intereseted, I'm sure you can find them on the web...just Google "Segment Trisection" + "Construction." We then defined an angle bisector.
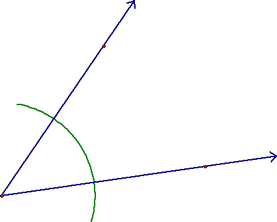
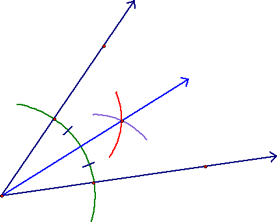
And learned how to construct one! Start with an angle, center your compass at the vertex and create an arc that crosses both sides of the angle:
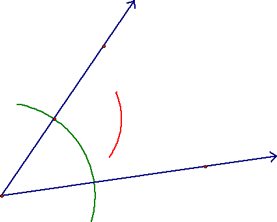
Now, center the compass at one of the points of intersection of the arc and one of the sides. Draw an arc in the center of the angle (the red arc).
Now, center the compass where the first arc intersects the other side and, with the same radius, draw another arc in the center of the angle (the purple one). Using the vertex and this "x" you can now use your straight edge to create the angle bisector. Don't forget to mark it appropriately!!
We then learned how to construct an equilateral triangle (in other words, a 60 degree angle). Start with a ray:
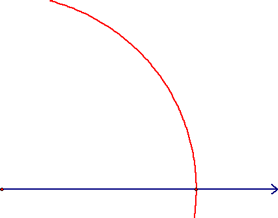
Next, center your compass at the endpoint of the ray and construct an arc like the red one below:
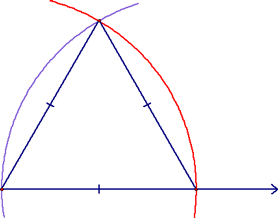
Now, center your compass at the place where the arc crosses the ray and with the same radius, construct another arc like the purple one shown below:
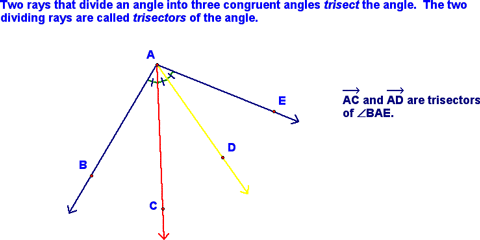
Finally, use the endpoint of the original ray and the point where "x marks the spot" to construct your equilateral triangle and/or 60 degree angle! Finally, we defined angle trisectors:
There is no construction for an angle bisector...weird, huh? Maybe you can discover one and become famous!
|
|
||||||||||||||||||||||||||||||||||
